
Imagine a late afternoon rush at the station: a client asks for something edgy for Halloween, you clear one table, pull out matte black gel and a small tray of tiny metal charms, and the mood shifts. The tray glints under the lamp—gold and silver skulls with dark engraved lines—and you already see the final photo in your head.
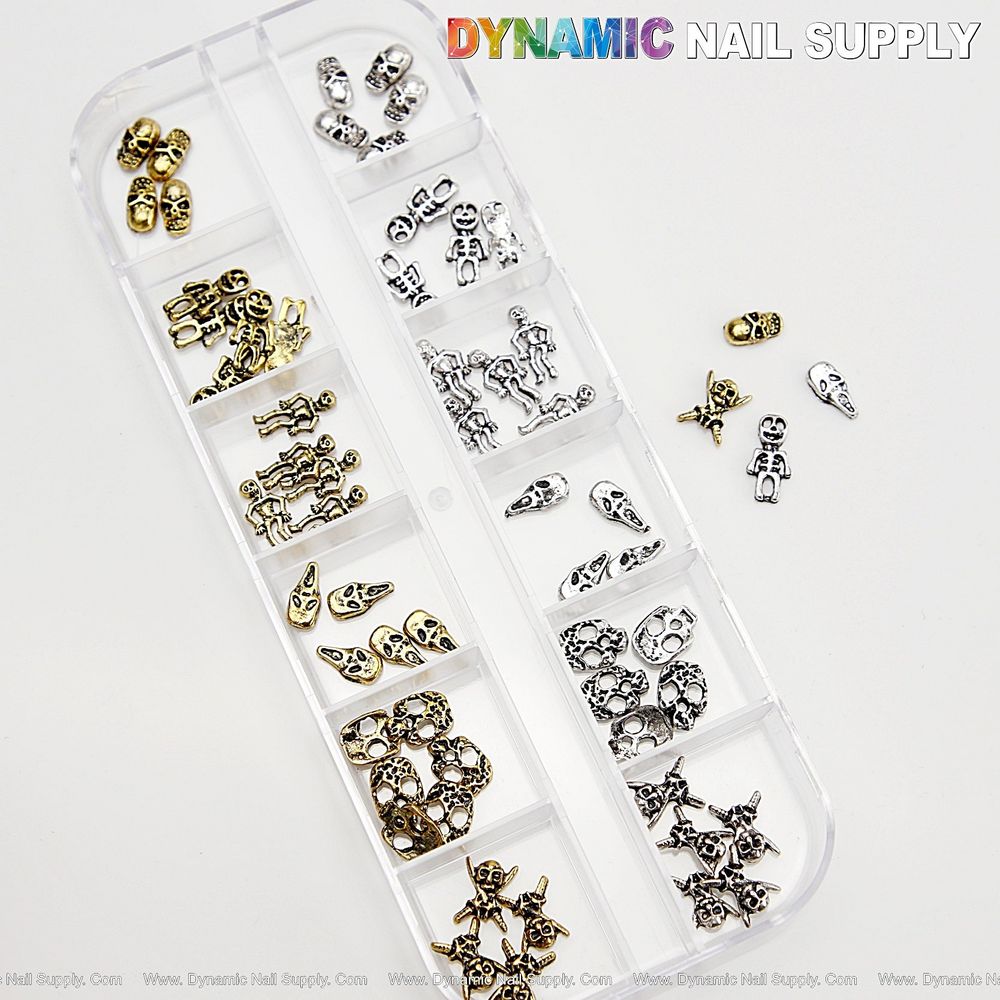
See the full mix of styles and finishes for the metallic skull nail charms to plan your next spooky set.
Prep: Start Clean
You set up your station the way you like it. Remove old product, push cuticles, and buff a tiny area where the charm will sit. If you use a gel base, keep it tacky for placement. If you prefer a matte base, cure the color first and then add a thin top layer where the charm will adhere. Place the charm tray within reach so you can pick shapes quickly; the set includes mixed skull, scream-face and small skeleton styles in both gold and silver finishes.
Placement: One Charm, One Statement
Work with one nail at a time. For a strong Halloween look, choose matte black or deep burgundy as your base. Use tweezers or a wax pencil to lift a charm—each piece has engraved dark recesses that create instant contrast on the metal surface. Set the charm on the tacky gel or a tiny bead of adhesive. Press gently so the engraved details sit visibly against the nail. Cure if using gel. You will find the mix of gold and silver makes it easy to design mixed-metal tips or to pair a single metallic charm with black glitter for a gothic glam thumb accent.
Design: Mix Metals And Textures
Think like a designer: pair polished chrome-like metal with matte finishes, or add cluster accents over a clear gel on a ring finger. Use a single skull on a negative-space nail to keep the look modern and spooky. For a more decorative route, cluster several small skeleton pieces over a clear gel and encapsulate with a top coat. The set shows both gold and silver pieces together, which lets you alternate metals nail to nail without pulling another pack.
Tools: What You’ll Need
- Tweezers or a wax pencil for picking tiny pieces
- Thin gel or nail glue for secure placement
- Curing lamp if you work with gel
- Fine brush to clean around edges before final cure
Station Routine: A Typical Service
You greet the client and confirm the look: matte black base, single metallic skull on the ring finger, and a cluster on the thumb. While the base cures, you arrange charms by finish and shape in the tray compartments. Pick a gold scream-face for the ring finger and a silver skull for the thumb cluster. Apply a small bead of adhesive, place each charm, and check alignment under the lamp. Finish with a top coat—matte over the black to keep contrast, or glossy for a polished chrome effect depending on the client’s vibe.
Finishing Touches: Seal And Photograph
Once cured, gently wipe around the charm to remove any residue. A thin bead of clear gel around the edges helps secure delicate pieces and smooths transitions, then cure again. Photograph under cool light to capture those dark engraved details that make the faces read clearly in photos. The reflective surfaces of the metal will pop against a deep, non-reflective base.
Safety: Small Metal Pieces
These charms are small metal accessories. Keep them away from children and pets. When using adhesive, avoid contact with skin and follow manufacturer instructions for the glue or gel you choose. Dispose of loose pieces responsibly.
Mini Glossary
- Engraved Details: The dark recessed lines on each charm that create contrast.
- Negative-Space Nail: A design that leaves part of the natural nail exposed.
- Cluster Accent: Grouping several charms on one nail for a focal point.
- Mixed Metal: Using both gold and silver pieces in one manicure.
Beyond Halloween: Versatility Notes
While shown here in a spooky context, these tiny polished metal skulls also work for gothic retro sets or chrome heart pairings. Swap the matte for glitter or deep burgundy to shift mood without changing placement technique. The high-contrast engraved lines and the two metal finishes let you create looks that read clearly at a glance.
Final Check: Service Checklist
- Confirm client color and finish (matte or glossy).
- Buff placement area and keep base tacky for gel or apply tiny glue dots.
- Place charm with tweezers and press gently to seat engraved details.
- Cure as needed and seal edges with thin clear gel.
Price note: this assorted set is listed at $7.99 and prices may change.
- Quick recap: matte black suits high-contrast skulls
- Quick recap: mix gold and silver for modern gothic looks
- Quick recap: use thin clear gel to seal clusters
