
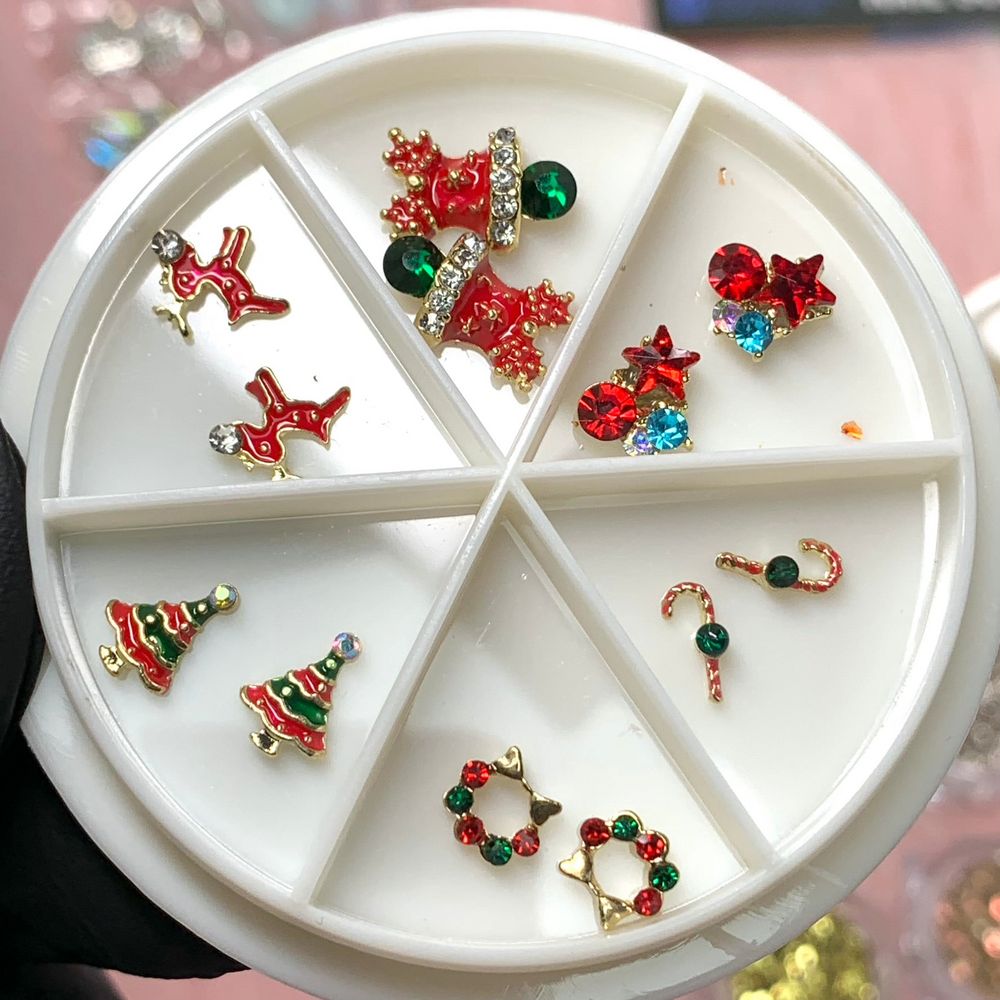
Holiday nails are a quick way to make your manicure feel seasonal and special. A small box of shaped metal and resin charms can add instant dimension — bells, stars and candy pieces bring a festive focal point to a single accent nail or an entire set.
What are 3D nail charms and why they work
3D nail charms are tiny decorative pieces made to sit on the nail surface. Unlike flat decals or stickers, they provide real texture and catch light for added interest. This Christmas nail charms set contains twelve individual motifs ideal for themed manicures and a range of creative crafts beyond nails.
What’s included and key features
The package contains 12 charms in holiday shapes such as bells, stars and candy. Each piece is designed to be easy to place and to complement typical nail art layouts. These charms are versatile: besides nail application they also suit small DIY projects like phone cases, jewelry accents, or decorated gift cards.
To purchase a ready-to-use 12-piece collection, consider buy Christmas nail charms set for a convenient starter selection that fits both salon and at-home use.
Beginner-friendly step-by-step: applying your charms
This section walks through a simple approach suitable for nail beginners. Gather basic tools first: tweezers or a wax picker, a small brush, nail glue or builder gel, and a top coat or sealing product.
- Prep the nail. Start with clean, dry nails. Push back cuticles and lightly buff the nail surface to remove shine where the charm will sit. Wipe with alcohol or a nail cleanser.
- Plan placement. Lay out the charms on a work surface and use tweezers to test positions on the nail before applying adhesive. Decide if you want one accent nail or multiple nails with charms.
- Apply adhesive. For single-piece placement use a tiny drop of nail glue or a dab of builder gel. If using glue, apply directly to the nail where the charm will sit; for gel, place the charm and then cure the gel by lamp according to the gel product instructions.
- Set the charm. Pick up the charm with tweezers and press it gently into the adhesive. Hold steady for a few seconds so the bond can form. Avoid touching until set.
- Seal the edges. Finish with a top coat around the base of the charm to help secure edges and reduce snagging. For stronger hold on larger pieces, apply builder gel around the charm base and cure.
- Check and finish. Inspect the charm for a tidy fit. Clean any excess glue from surrounding areas using an orange stick or small brush dipped in nail cleaner.
Simple design ideas for holiday looks
- Single-statement accent: Place one bell charm on a neutral base color for an elegant, minimal holiday touch.
- Mix-and-match nails: Use stars on some nails and candy pieces on others for playful variation.
- Layer with glitter or rhinestones: Surround a charm with a halo of small rhinestones or a dusting of glitter for extra sparkle.
- Seasonal color blocking: Paint half-moons or diagonal color blocks and set a charm where the colors meet for a modern twist.
Care, removal and safety notes
Because these are small, three-dimensional decorations, take a few care steps to extend wear time: avoid excessive picking or rubbing, be gentle when handling tight clothing or gloves, and check charms periodically to ensure the adhesive remains secure.
To remove, soak nails in an appropriate remover (depending on your adhesive type) and gently pry charms off with a cuticle tool after the adhesive softens. Never force a charm off; that risks damaging the natural nail.
Keep the charms out of reach of young children and pets. These are small parts and may present a choking hazard if swallowed. If you have questions about the product or ordering, Dynamic Nail Supply lists contact details with their stock and support.
Who this set is best for
This 12-piece set is ideal for beginners who want to experiment with holiday nail art without committing to large, expensive kits. It’s also suited to hobby crafters looking for small decorative accents for phones, cards, or small accessories. The set’s compact count is convenient for single-use looks or for adding a few accents across a client book.
Final tips
Start with one charm per hand as you learn placement and adhesive choices — it’s easier to remove and replace a single accent than to redo an entire manicure. Keep a small toolbox with tweezers, nail glue, and a tiny jar for spare charms so you can repair a misplaced piece quickly. The set is priced affordably and can be mixed into other seasonal supplies to stretch creativity across multiple looks.
With a little practice, these small festive pieces will become go-to accents for quick holiday transformations.
