
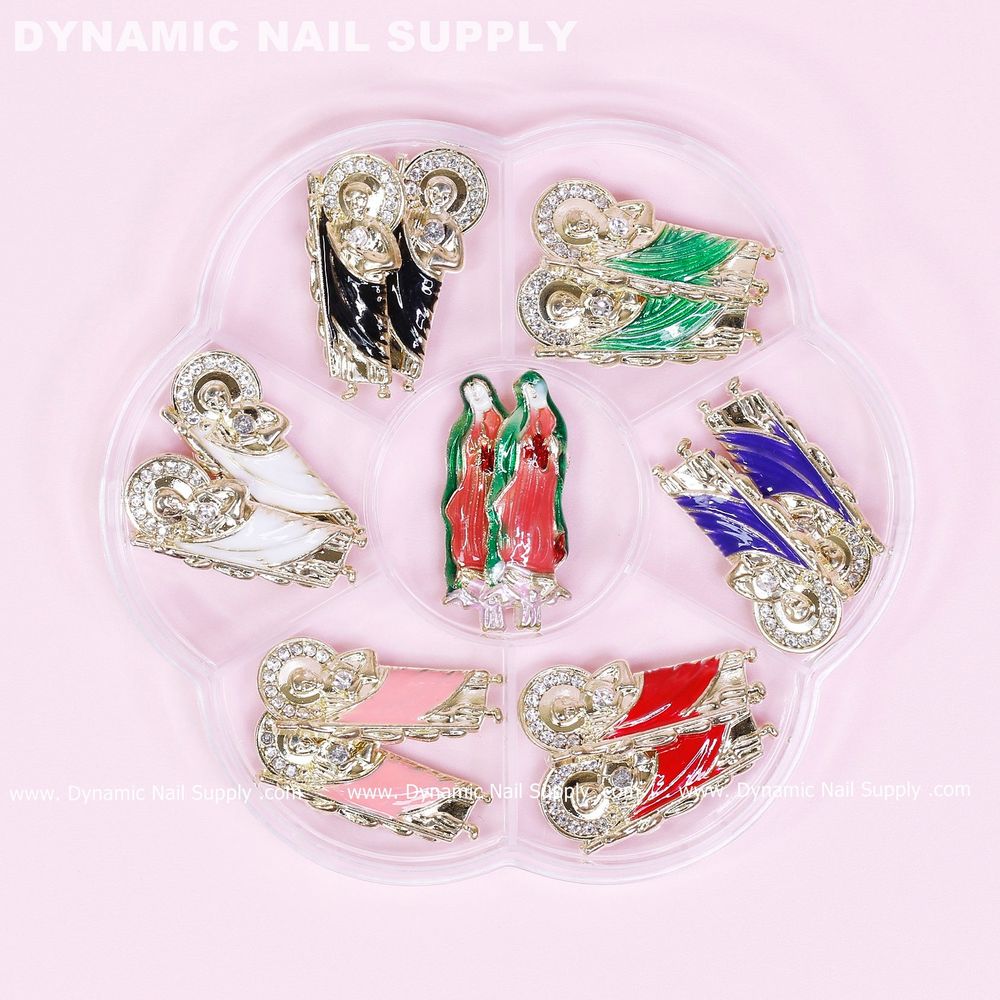
It’s a busy morning at the station and a client asks for something ornate and festive — not subtle, not safe. You reach into the round divided tray and pull the 14 pcs Mixed Colorful Religious Charms set: tiny gold‑outlined Virgin Mary and San Judas pieces with jewel-toned enamel and clear crystals. This is the day’s focal point.
Prep: Start Clean
You set the tone by prepping like a pro. File, shape, and push cuticles back. Remove surface oils with a lint‑free wipe and an alcohol prep. For this vintage green-and-red look, plan two focal nails per hand: one with the paired Virgin Mary center figures and one accent nail that will host a single gold charm.
Palette: Block Color Plan
You pick two polish layers: a glossy forest emerald green for most nails and a bright, cheerful red for alternating nails or tips. For the center figures that have deep red and forest green enamel in their details, match the green to the emerald base and choose the deeper red for the accent nails so the charm reads as part of the design rather than floating awkwardly.
Application: Color Blocking Steps
- Base coat: Apply a thin, even base coat and cure if using gel. This keeps the enamel colors bright and the surface smooth.
- Green foundation: Paint two coats of the emerald green on the nails chosen as the main field. Cure between coats if you’re working in gel.
- Red placement: Paint the bright or deep red on the alternate nails or do a French-style red tip. Use a fine brush for crisp edges when you color block tips beside green panels.
- Contrast nail: For a vintage romantic option, paint one nail bubblegum pink or creamy white as a soft contrast and save it for a single gold charm placement.
Embellish: Charm Placement and Securement
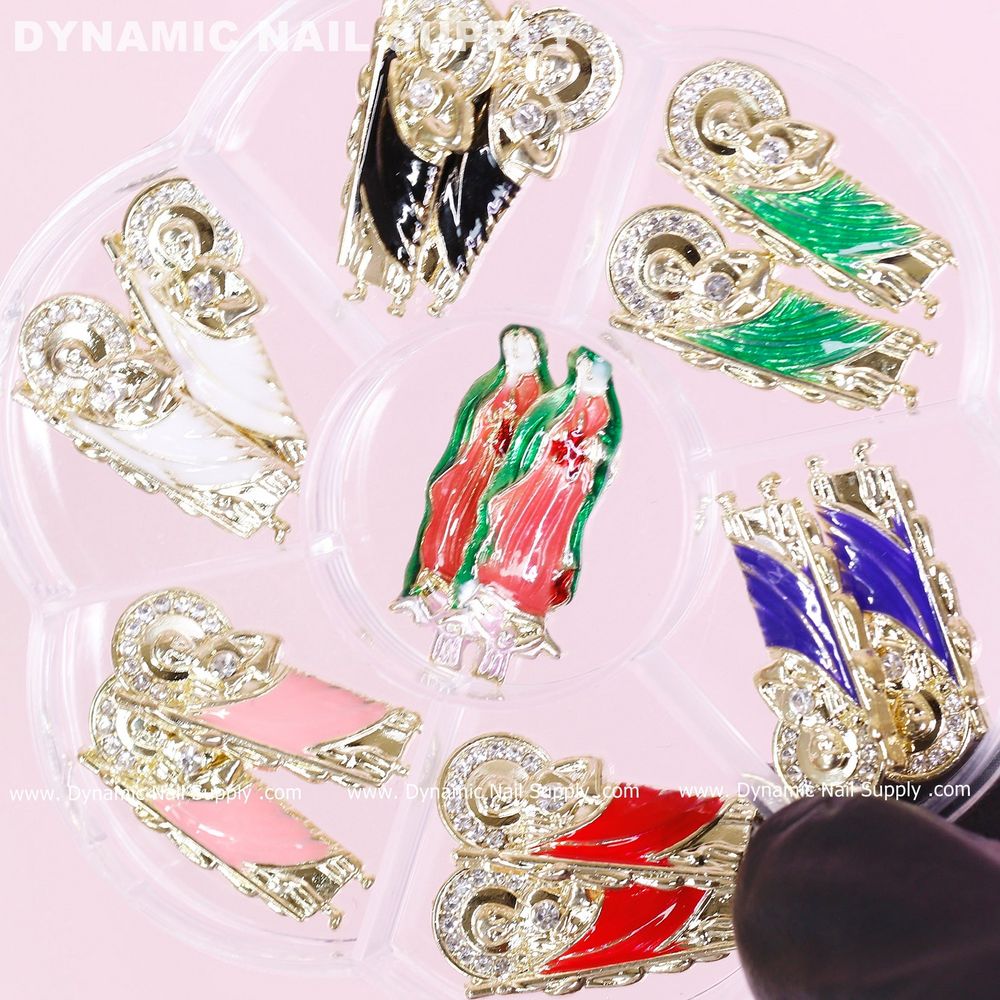
Now you bring in the 14-piece charm set. The charms sit on gold-plated frames with high‑gloss enamel and clear rhinestone accents. Because these are miniature devotional figures, you’ll treat them as focal jewelry rather than flat decals.
- Layout first: Dry‑fit the paired Virgin Mary pieces over the emerald nails to see how they read. These two matched center figures work best on the longest nail or the nail you want to make the visual center of the hand.
- Adhesive choice: Use a clear gel adhesive or a tiny bead of builder gel where the charm will sit. Place the charm while the adhesive is wet and cure for a full lock. If you use polish topcoat adhesion only, press gently and allow the topcoat to set fully; however, gel anchoring gives a stronger hold for heavier metal charms.
- Single accent: For the nude or pale pink accent nail, place one gold‑outlined charm in the center near the cuticle or at the tip. A single charm on a neutral base reads classic and vintage.
- Cluster tip option: For an ornate tip, arrange small charm clusters at the free edge over the green or purple background. Avoid crowding the edge so the charm doesn’t catch on fabric.
Topcoat: Protect the Crystals
These charms have clear rhinestone accents set into gold metal. Protect those stones without drowning the charm detail. Use a generous but controlled gel topcoat around the charm base to seal edges — do not cover the top surface of larger raised rhinestones with too thick a layer. A no‑wipe gel topcoat or a thin, glossy builder gel cured in short bursts gives the best balance of shine and protection.
Finish: Clean Lines and Shine
After curing, wipe tacky residue if using a no‑wipe topcoat. Use a tiny dot of topcoat to fill small gaps between charm and nail plate. File and smooth any rough resin or gel at the bail points, then give the finished manicure a final pass of gloss to make the gold plating and enamel panels sing under the salon light.
Station Workflow: Timing and Tools
You run this as a tidy 60–75 minute service for natural nails: 10 minutes prep, 25–30 minutes color work, 15–20 minutes charm placement and curing, 5–10 minutes finishing and inspection. Keep a small pick, micro tweezers, a flat spatula, clear gel adhesive, and a no‑wipe topcoat at hand. Store the charms in the round divided tray they arrive in so sets stay matched and you can pull the paired Virgin Mary figures quickly.
Design Notes: Where This Set Excels
- The mixed palette uses jewel and primary tones — black, emerald green, royal purple, bright red, bubblegum pink, and creamy white — all framed by gold for an ornate vintage mood.
- Gold‑plated outlines and clear crystals create a devotional, votive feel that reads well against glossy black or emerald backgrounds.
- The central paired Virgin Mary figures work as immediate focal points for holiday green-and-red schemes.
Safety & Handling
These are small, metal‑edged pieces. Keep them away from children and pets. Handle with tweezers and store in the divided tray to avoid losing tiny rhinestones. If a charm comes loose, remove it and reattach with a proper gel adhesive rather than trying to glue it with household adhesives.
Mini Glossary
- Round divided tray: Small storage tray with compartments that keeps matching pairs organized.
- No‑wipe topcoat: A glossy gel finish that needs no alcohol wipe after curing.
- Gel adhesive: A salon cured glue that secures heavier charms to the nail plate.
Before your client leaves, check edges and ask them to avoid heavy grabbing for 24 hours. If you want to show the set in your studio, the 14 pcs Mixed Colorful Religious Charms set works well displayed next to emerald and red polish swatches; note that pricing can vary (this set has been listed around $7.99 at times).
For this holiday look, the green and red religious nail charms create a strong, vintage devotional statement and fit multiple placement strategies — focal paired figures, single accents, or clustered tips. If you want to order or get a closer look at how these specific enamel pieces sit in the tray, 14 pcs Mixed Colorful Religious Charms
Quick Recap
- Prep clean nails and plan two focal nails per hand.
- Block emerald and red colors for a vintage holiday contrast.
- Use gel adhesive and a no‑wipe topcoat to protect crystals.
- Store charms in the divided tray and handle with tweezers.
