
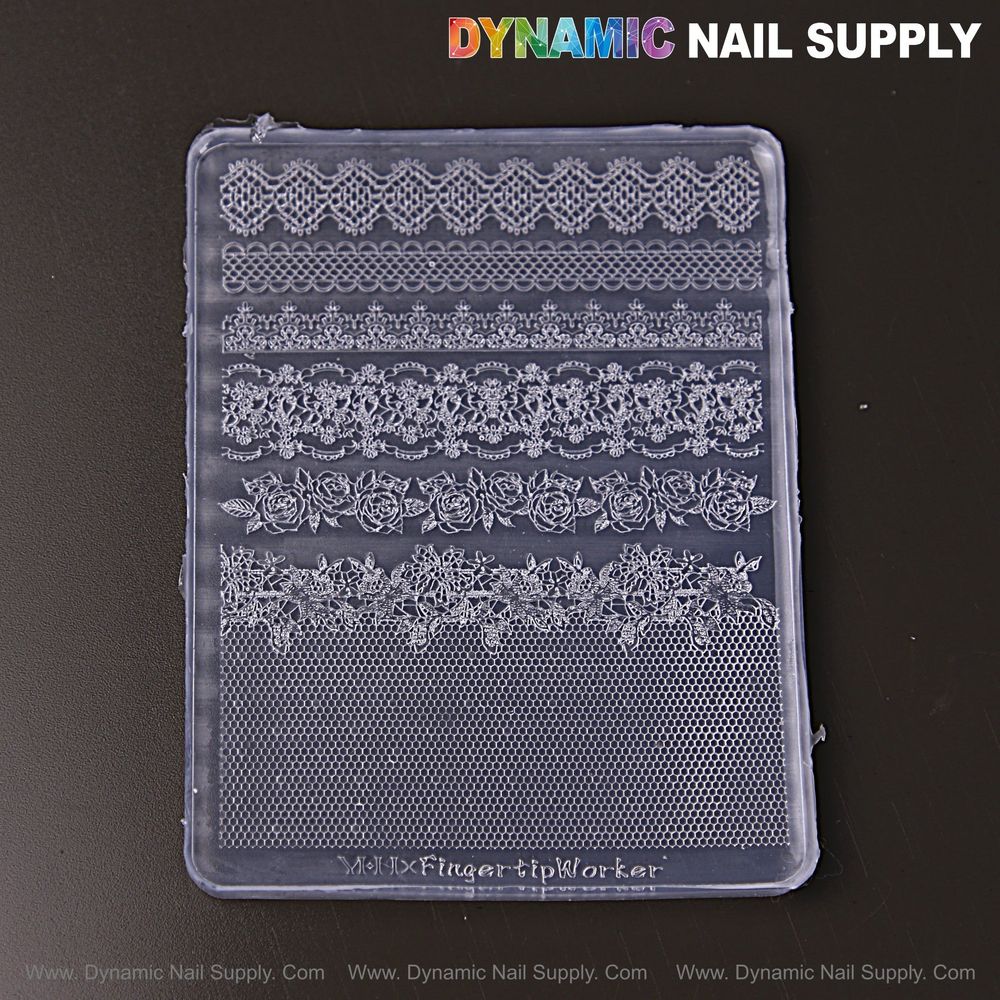
It’s mid-morning and a bridal set is on your station. You lift the lamp, peel back a strip of translucent bluish-clear silicone and line up a lace border to sit over a soft cream tip. The silicone’s fine raised floral and net-pattern embossing shows white-ish edges against the matte black backdrop. You know the look: delicate, high-contrast lace built fast and built to last.
Prep: Start Clean
You begin every service with a clean work area and the right tools. Wipe the silicone sheet with alcohol or a nail cleanser to remove dust. Make sure it is dry and flat on the station. Keep a scraper card, carving pen or dotting tool, tweezers, a soft silicone brush, and your UV/LED lamp within reach. Lay out your solid gel or sculpting gel and any pigments or chrome powders you plan to layer.
Station: Set Up The Mold
Place the long vertical silicone sheet so the raised lace borders face up. The translucent bluish-clear material makes it easy to see detail; the white-ish raised edges will help you line up placement. Work on the matte black side of your prep mat or a dark towel so the fine embossing is easy to read.
Technique: Filling Small Cavities
For crisp white lace charms you want full cavity fill without trapped air. Use a mini scoop or a tiny spatula to press a bead of solid gel into the cavity. Then use a carving pen or dotting tool to push gel into the delicate net-pattern pockets and flower centers. Hold the scraper card at about a 45° angle and drag it across the mold to remove excess product so the surface is flush with the mold plane. If you are aiming for pure white embossed accents, use a white builder or carving gel; if you want subtle sheerness, mix in a touch of translucent gel.
Cure: Timing Tips
Once the cavity is filled and the surface is clean, cure under a UV/LED lamp. Start with 30–60 seconds for most solid gels and adjust upward if your product requires longer. For no-wipe 3D gels that set differently, follow the manufacturer’s instructions but keep in mind the thin embossed pieces will cure faster than bulk shapes. After curing, don’t force removal. Gently flex the silicone from the edges and lift with tweezers. This protects the fine lace edges from tearing.
Order details and product link for the mold are here for quick reference:
Finishing: Placement And Adhesion
Position the finished charm on the nail with a dot of builder gel or clear adhesive. Fit the lace border into gaps along tips and curves so it sits flush. Use a small brush to add a thin bead of builder gel around the perimeter if you need extra hold, then cure 60–90 seconds to secure the charm and the surrounding top coat. If you plan layered negative-space work, place lace over a sheer base and top-coat the visible edges only to keep depth.
Creative Touches: Color And Texture
After demolding, you can add chrome powders, pigments, or tiny rhinestones to the raised areas. Because the mold captures very fine detail, powders will catch on the raised threads and floral centers for a realistic lace look. For antique-inspired sets, tone down gloss with a matte top coat on the base while leaving the lace slightly glossy for contrast.
Care: Mold Maintenance
Clean the silicone after each use. Rinse with warm water and mild soap or wipe with alcohol, then dry fully before storing flat. Keep the sheet out of direct sunlight to preserve its elasticity. Gently flex rather than pulling when you remove tiny pieces—this reduces the chance of stretching or tearing the delicate borders.
What You’ll Need: Tools Checklist
- Translucent bluish-clear 3D lace silicone sheet (this design)
- Solid gel or sculpting gel suitable for charms
- Carving pen, dotting tool, scraper card, tweezers
- UV/LED lamp and a small silicone brush
- Optional pigments, chrome powders, rhinestones
Mini Glossary
- Embossed charm: A raised decoration created by filling mold cavities.
- Curing: Hardening gel under UV/LED light.
- Demold: Removing the cured piece from the silicone.
- Top coat: Final clear layer to seal and protect the charm.
Safety: Simple Handling Notes
Work in a well-ventilated area and avoid direct skin contact with uncured gel. Keep cured pieces away from pets and children. Store the mold flat and out of direct sunlight to keep the silicone flexible.
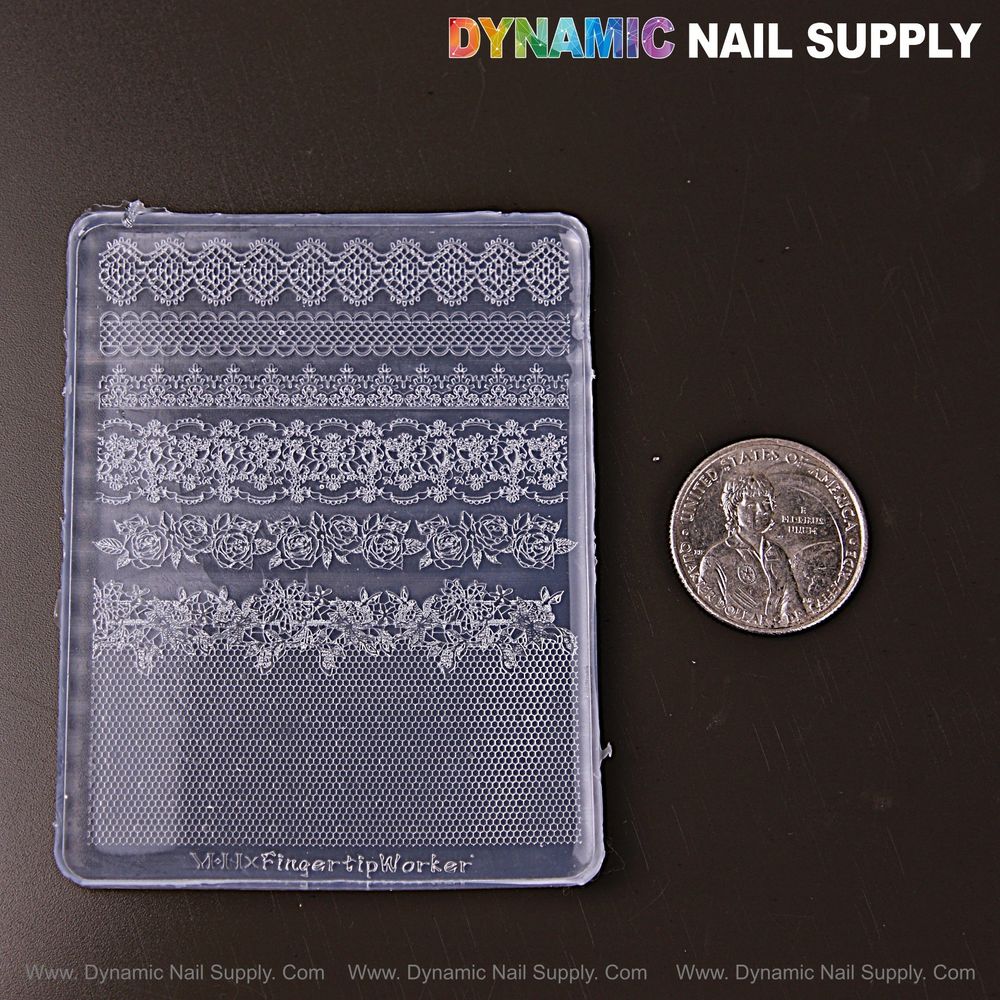
These translucent bluish-clear lace patterns pair especially well with blush, cream, nude and pastel bases. The mold’s long vertical sheet shows several horizontal lace borders, so you can produce many matching charms at once. The fine, high-detail floral and net-pattern embossing delivers crisp edges that read white-ish under studio light against a dark station surface.
Final Notes
The design-focused silicone sheet makes producing repeatable, salon-level lace accents fast. At the listed price of $3.99 (prices may change), you can add repeatable border motifs to set services and custom orders without sculpting each time. Consider keeping extra sheets ready so you can switch patterns mid-service without delay.
- Clean and dry the mold before use.
- Fill cavities fully, scrape flush, and cure 30–60 seconds.
- Flex the mold and remove charms with tweezers; secure and cure 60–90 seconds.
